Showing posts with label Backpacking. Show all posts

Saturday, January 23, 2016

Glory Hole - Arkansas

Since most of the USA is in a winter wonderland, I thought I'd offer my own little version of Arkansas' Ozark National Forest coolest waterfalls. I'm not sure who took this photo, and I'd actually love to find out. Well done. Personally, I'd like to ride out a hurricane type down pour/blizzard event and photograph the results. It's on my bucket list...

Photo from Reddit - photographer unknown

More information by following the link.

Keep Right on Prepping - K

Sunday, March 10, 2013

Back to Hot Water and Electricity

Just a short pictorial of the trip and a few comments:


The tent review is a bust, Mr Planningandforesight, Aka me, forgot to double check the gear, and the tent poles were in the closet at home. It was back to the basics, a tarp, rope, and some tent stakes.


Friday's day hike took us from Kyles Landing (base camp) on the Buffalo National River to Indian Creek. Rough terrain with great views. The crew consensus was that this would be our last time to camp at this location. We have pretty much explored all the areas within easy reach. A Float trip is being discussed for next year.


One of the crew in the picture for comparison.


The food was really terrible....Grilled Ribeyes, Pan-fried potatoes w/ onion, Caesar salad, Merlot Portabella Mushrooms w/ red onions toppings. 


Breakfast: Butter Croissant, Boer's head bacon, fried egg, and sharp smoke cheddar.


My favorite picture of the whole trip is the one above or below.


My updated self portrait. No tent review, but I will be doing a boot review of these TruSpec Boots.


 Water pouring out from under the rocks within the river bed area.


This is the same area but looking into waterfall area. I really liked the erosion on the ceiling area.


Home Sweet Home.


Saturday afternoon was made for studying at the campsite. The crew went out while I sipped on iced tea and made flashcards.


 We ran across this interesting bug out vehicle. The tent sits on top of the trailer, and the storage is stored under the tent. The entire trailer when readied for transport is smooth on top and has the same clearance as the Jeep.

Glad to be Back Home and Keep Prepping - K


Wednesday, March 6, 2013

Annual Camping Trip

I'll be headed out of town with "the crew" for our annual backpacking trip tomorrow around noon. It's always nice to hang out with the guys, especially since we are all married and time is limited for these manly gatherings.


I have a few ideas for pictures, posts, and some gear review(s) for you.

A family sized tent I've used on numerous occasions will be photographed for a review. A friend is supposed to be bringing a hovercraft that could be used for security operations. A recipe for a "Dantini", which is a lemon vodka shooter, is my specialty that will be featured on this trip. I think we have a few camping recipes, I'll try to photograph for a pictorial recipe. These are just some of the ideas on the top of my head for future posts...I hope the Dantinis don't get in the way.

Oh, and the guys have no idea that I'm a prepper either, which should be interesting and an entirely different post. Last time I tried to approach the subject of preparedness, it was merciless ridiculed. National Geographic has ruined the public perception of being ready. Maybe the Zombie approach to the subject of prepping would be more receptive? Kind of ironic that we can talk openly about a fictional zombie attack, but can't talk about a realistic disaster.

Keep Right On Prepping - K ( I'll see you Sunday evening )

Wednesday, January 30, 2013

How to Select A Backpacking Sleeping Bag

I've been actively backpacking for over 20 years, and it is my opinion that your selection of a sleeping bag is the most important one that you will make concerning your gear. There are numerous factors in deciding which one to buy. I will not be focusing on car camping sleeping bags since the option to bring blankets or leave is always an option.


There are usually several features that you will have to weigh when selecting your own sleeping bag.

DOWN VS SYNTHETIC:

I have always considered my sleeping bag my last line of defense against hypothermia. Hypothermia is when the body core is lower than the ideal range. The three biggest factors are moisture, wind, and air temperature. I have had small degrees of hypothermia in my wanders, and it can easily escalate into a life threatening situation if you do not take the proper steps to reverse it. Your sleeping bag can mitigate all three of these factors.

I prefer synthetic because it still insulates when it is wet. The tradeoff with synthetic is that it doesn't compress as much as down filled bags, but technological changes have made huge strides in recent years. I would consider carrying a down bag if I was absolutely certain that the bag would stay dry.
Also realize that your body will add moisture inside the sleeping bag, so allowing it to dry out is considered trail maintenance. This could be hard on very humid days.

TEMPERATURE RATING:

I try to buy the best bag for the most extreme temperature ratings for your main area of backpacking. If in doubt, buy a lower rating than normal because you can always unzip it a little, if you get too hot.

In the south, I have always been comfortable in a 0 degree mummy bag. If I was making regular  trips to the alpine regions of Colorado, then I would purchase a lower temperature rating sleeping bag.

SIZE AND WEIGHT:

The "Big Three" of backpacking are the three items that contribute the most weight to your backpack. These are the pack, tent, and sleeping bag.  I learned a new saying early in my hobby, "Ounces make pounds". Needless to say, if you are of average height, don't buy the extra long sleeping bag.  I've found that around six inches distance between your foot and the bottom of the bag leaves plenty of room to stash your clothes. TIP: Keeping your clothes in the bottom of the sleeping bag makes it much more pleasant to get dressed on those cold cold mornings.

VOLUME:

This is an often overlooked factor in determining the sleeping bag that is right for you. Sleeping bags do take up a lot of real estate in your backpack.

DESIGN:

I would only consider mummy bags.

*A well designed bag will have draft tubes behind the zippers. These draft tubes block air from creeping inside the bag.

*A collar is another great design feature. The collar is situated under the chin and performs the same function as the draft tubes.

* The hood should have a drawstring opening so you can cinch it down around your face when it gets cold. TIP: Larry Williams, my backpacking mentor, showed me how to stuff my sleeping bag's stuff sack with clothes to form a pillow.

SHELL AND LINING:

Water proof is not the same as water resistant. Keep this in mind when looking at sleeping bags.

I highly recommend visiting a local outdoors shop that has a knowledgeable staff, and have your list of priorities. For example: I would say that "I'm definitely looking a mummy bag with these features: synthetic, lightweight, and zero degrees rating. It would also be nice if it packed small (compressibility)."

The store clerk can then guide you to what they have in stock. Your job will be to examine each bag for their features and price. One last word, there are some great bags out there for reasonable prices. I am still using the same bag I purchased over 15 years ago at $200.00, and the same comparable bag can now be purchased for around $75.00.

BONUS TIPS:

When you wake up in the middle of the night or early morning, and have to urinate. Go! The amount of body heat to keep the urine warm is considerable, and you'll sleep much warmer with an empty bladder.

A quick way to warm up when you first get into the sleeping bag is to repeatedly relax and contract the muscles. I've found that I'm fairly comfortable in less than a minute.


Thursday, November 29, 2012

Using Contrails To Predict The Weather


Mohave Rat recently had a post dealing with contrails, and I offered an explanation for them, hence this new post. I first learned how to read them from Larry Williams, an extraordinary outdoors man.


First, we need to define contrails. Contrails is short for condensation trails. They are those long or short lines behind the jet airplanes that appear in the sky. The condensation trails are formed by water vapor that condenses or turns into ice crystals depending on the air temperature of the jet's altitude. Armed with this knowledge, you can mostly predict the weather. It isn't 100% accurate, but reliable enough when backpacking on extended trips.

Air can contain no more than a certain maximum amount of water vapor at any given temperature. The higher the temperature of the air, the more water vapor it can hold. When it is cold enough and there is moisture in the air, the exhaust of a jet engine "seeds" the water vapor making contrails. Snow and raindrops are also formed around a speck of dirt, which explains why the car gets so dirty after a rainstorm. If the temperature of the air at which condensation takes place is above freezing, water droplets form. If it is below freezing, ice crystals form.

Some contrails are short and some are long. On days when the contrails are short there is little moisture (cold) in the air at high altitudes. When the contrails are long, there is more moisture in the air (warm) at that altitude. You can take note and notice the rate at which the contrail disappears to determine the amount of moisture in the atmosphere.

You can predict the weather by taking advantage of this information in the sky. If the contrails are short, and there are few or no clouds in the sky, then there is little moisture in the upper atmosphere. The chances are very good that the next twelve to twenty-four hours will be clear. If the contrails are long, the moisture content of the upper atmosphere sky is high and more clouds or even a storm is on the way.

You can take two viewing of the contrails in the day and extrapolate a more accurate weather prediction. Short contrails and a clear day in the morning, then long contrails and clear in the afternoon most likely means that it will be clouding up tomorrow. You get the idea.

You can also get an idea of the direction and speed of the upper atmosphere winds by watching the contrails.

 The planes most likely crossed from right to left, and the winds are blowing from bottom to top of the picture. I say most likely because the contrails are thicker on the left side, and it dissipates on the right side. The upper atmosphere winds are pushing the contrails towards the top of the picture as the bowing of the contrails suggest. The winds don't move in nice fronts like the weather maps show on tv.

Have fun with this knowledge, make some notes, predictions, and observe the results.

Oh, and that sprained ankle from a few years back is an excellent barometer too!

Keep Right On Prepping - K


Saturday, July 7, 2012

Found Photo Gold on an old CD

Self Portrait 

Old Swimmin' Hole

A view from the best campsite.

Some of "The Crew"

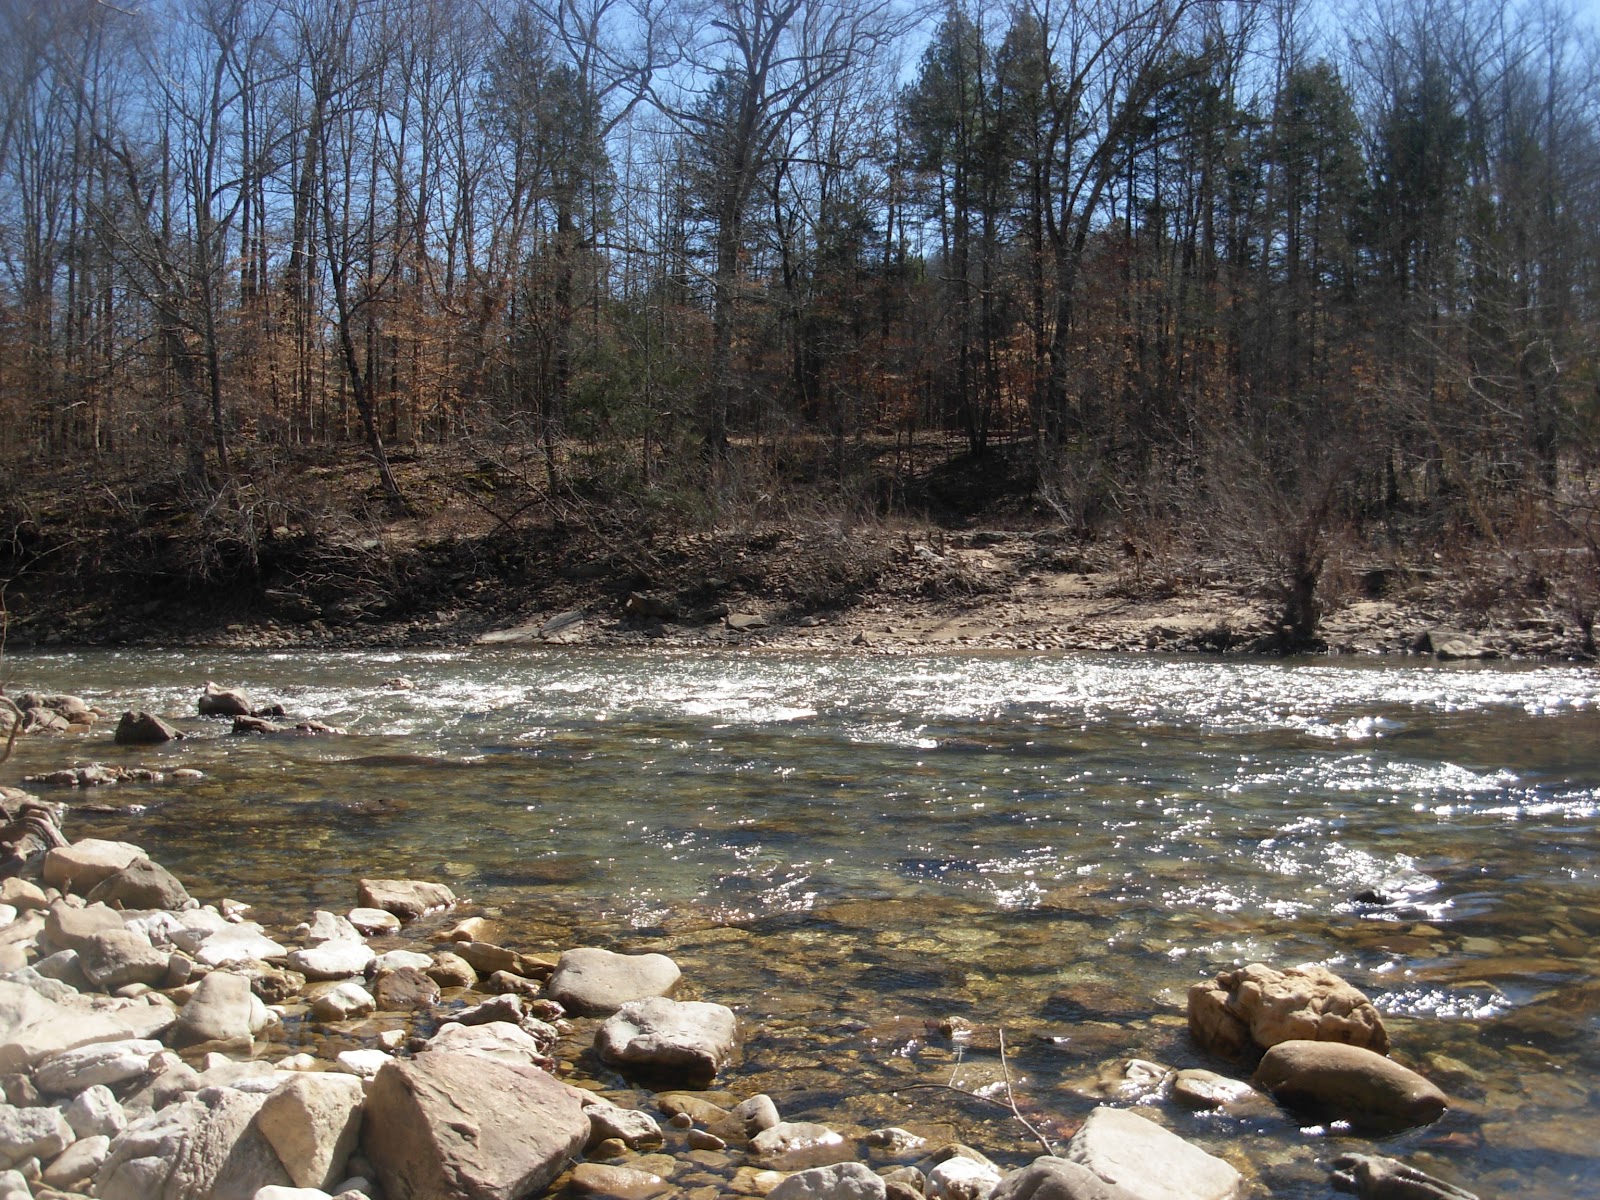
My backpacking Mentor always said,"Remember that most backpacking accidents happen at river crossings". No Accidents Here.

Saturday, June 2, 2012

Tyler Bend - Buffalo National River

 America's First National River


I was going back through some old photos on my computer and ran across these of Tyler Bend on the Buffalo National River. This public campground is on the middle section of the river, which means the river is good for canoeing year round. The Bull Shoals dam on the White River affects the water level of the Buffalo National River's lower half because the dam is located near the conflux.


The campground is nice. I prefer going during the middle of the week, so that I see fewer people. The campground has a visitors center, bathrooms, and water.


Here are a few links that are a lot better than what I could do:

National Park Service

Recreation dot gov

Buffalo River Outfitters : I have not personally used them, but have heard good things.

Map : Great overview of most of the Buffalo National River.


This campground is accessible for all vehicles.

Keep Right On - K

Sunday, April 29, 2012

Ultralight Backpacking Cache or SHTF Cache - Part 1 of 2

BACKPACK VERSION:

I only have experience in woodland caching, so you may have to modify some of this information for your region.

( picture from Google )

The most important thing that I can say about caching, make sure it is allowed in the recreational area. Also be sure that the container that you use will be picked up. My friend would always use 50cal ammo cans. They ran him around $13.00 and it guaranteed him that when he deposited it along side the road, it didn't stay there long. Other options have been food grade containers, but size tends to be the problem when digging the cache. Generally, mostly food items are stored in the watertight container as a resupply point. I'll run through a short list of what I have personally stored in some of my caches.
  • Paperbook books - Thoreau,  Orwell, Asimov , and short story fiction.
  • Lighter - just in case and it takes up little room
  • Candle for tent - old used tuna can for base
  • Tuna/canned meats
  • MREs
  • dehydrated meals - All individually Ziplocked, then Ziplocked in a gallon size freezer bag.
  • Toilet paper roll
  • M&Ms
  • Fresh socks - fresh socks are great!
  • Capt. Morgan or Gentleman Jack
  • Cigarettes - back when I smoked.
  • Pasta/ dehydrated tomato paste/Parmesan cheese
  • Navajo bread mix/small can Crisco
  • Cashews/Almonds/nuts
  • Dried Fruit/Crackers
  • Spare batteries
  • Coffee/SUGAR/Tea Packets/Koolaid
  • Map sections for further up the trail
  • New Trash bag/ Wet Wipes
  • Note - I'll explain later
Hopefully, this will give you some ideas. I have stored fuel (white gas ) further under the cache in a separate heavy duty contractors trash bag. I am frugal, but the extra cost of the contractor trash bags are well worth the investment. The same goes for Ziplock brand baggies. I have taken cheaper brands on my hikes, and have regretted the "savings".

LOCATION:  It is usually located near a trail head or roadway for easy caching. I try to choose an elevated rocky hillside area to bury my cache. Make sure it is out of a flood area, where water collects, or pathways of water. IMPORTANT: You should very carefully consider where and how water will travel. Moss indicates constant water. A good location should be easily found by only you.

NUTS AND BOLTS: All of the items inside should be secure and stable. Once the container is closed, I like to sanitize the outside with a slight bleach water solution. I am probably being over cautious, but feral hogs and bear are a real threat to a hidden stash.

Security is also another issue. Do not bury the cache while other people are around.

Now, back to the contractor trash bags. The cache should be put into it with the opening of the trash bag pointing down. Think water flow. I'll dig a little deeper and place the fuel canister, also wrapped in a contractor trash bag, below the actual cache to keep any chance of contamination to near zero. The dirt is flung to make the area appear undisturbed. Any rocks are carefully set aside to be placed around and on top of the cache. Forest duff  is placed around the area to help the cache blend into the area. I will almost always carry a few larger stones to place on top of the cache to mark, but more importantly deter any critters from getting into the cache.

The Note: Usually I leave a short worded note saying that I am a thru hiker and to please throw the trash away and thanks. Never signed, never giving direction, never giving any clues.


 To be continued....SHTF cache link here

Here is another post with a You Tube video describing how to make a PVC tube for caching.

Wednesday, April 25, 2012

How to pack for an ultralight backpacking trip ( or anything )

My backpacking guru, Larry Williams, broke it down for me many many years ago. He told me to think of my backpack as a house. I should make a list of the rooms in the house, then go from there...


In the kitchen, I would need pots, camp stove, fuel, eating utensil, etc...
In the refrigerator, I would need the food for the trip.
In the bathroom, I would need my first aid kit , toilet paper, toothbrush/toothpaste, and other stuff.
In the closet, I would need my clothes ( remember rain gear ).
In the bedroom, I would need my sleeping bag, pad (Thermarest is best), bivy bag.
In the living room, I would need my maps, compass, entertainment ( mini starwheel , whiskey ), etc.

Make a list! This house analogy is the best that I've ever heard on "How to Pack". It can be applied to any situation, whether it is a bugout bag, diaper bag, luggage, or backpack.

TIP: Keep your list as a future reference, and go over it once the trip is done to see what can be added or taken off.
TIP: Buy quality light weight gear. Ounces make pounds, and pounds make a happier hike.
TIP: Knowledge is lightweight and you can never carry too much of it.

Tuesday, March 13, 2012

Ultralight Backpacking First Aid Kit

My Backpacking Mentor or Guru, Larry Williams, encouraged me to build my own first aid kit when I asked him, "What should I carry?" He did give me some advice based on his personal experiences : a small mirror and tweezers. I built my own first aid kit based on my own experiences. I have yet to use the tweezers, but can see where they could come in handy. A mirror in case you get something in your eye, or forget what you look like. Blisters will happen on the trail if you aren't careful, so moleskin or duct tape is useful. Duct tape will last you the entire trip once applied to the skin, otherwise carry enough moleskin for each day's hike. I have burned myself more times than I have had blisters, but thankfully cool water was nearby to soothe the burn. With any large burn, dehydration is your first twenty four hours concern, then infection. This leads into a antibiotic cream, salve, or spray. Of course, Band-aids are a required item to carry too. I usually carry a variety, fingertip, regular, and at least one good sized one. The amount should be varied for the length of the trip. Keeping the cut clean and infection free is your prime concern. Fingernail clippers have also been quite useful. A piece of paper and a pencil nub to make notes is a good idea (think wishlist). Butterfly closures are the newest item that I carry. Always, always replace what you have used after the trip and check expiration dates of medicine ( aspirin or Tylenol ) before each trip.

Pack what you think you might need, then hope you don't have to use them. Assess what you used, and what would have been nice to have on hand. Each person's first aid kit will be different, but similar.

Due to emails and requests, I have updated this page.

The List:
  • Hard Case Container: I have used a Ziplock baggie in the past to shave a few ounces, but prefer the harder case to protect the contents. I have broken too many items to justify the weight difference.
  • Tweezers
  • Small Mirror: It can also double as an emergency signal device.
  • Moleskin
  • Duct Tape Strips :attach these to the outside of case in a few layers.
  • Neosporin Antibacterial  Cream
  • Knuckle Band-aid
  • Large Band-aid
  • Butterfly Closures
  • Pencil nub and paper for notes
  • Fingernail clippers
  • Tylenol ( 1 per day of trip ): fever reducer and pain reliever
  • Aspirin ( 1 per day of trip ): fever reducer and anti-inflammation drug
  • Benadryl if allergic to bees and wasps
  • Alcohol swabs: doubles as eye glass cleaner

Monday, March 12, 2012

Indian Creek - Buffalo National River

The trail to Indian Creek is very well marked from Kyle's Landing. Just follow the beaten path upstream and look for the markers.
The first part is a scramble and lots of photo opportunities.
At one point, you can either keep heading into the creek and eventually get stalled or hike up onto the bluff line. I chose to head up the creek and see the waterfalls.
Why should I miss the water action?

Life is good in the woods.

Thursday, March 8, 2012

Kyle's Landing - Day and Night

This was our campsite along the Buffalo National River, those are our tents on the lower left. The bluff is named Buzzard Bluff, and yes, there was a family of turkey vultures that made it home. It was nice to watch them play on the updrafts.


The picture below was taken in the same spot facing a ninety degree turn counterclockwise.


 Can you name all of the planets in this picture? (This was one of LAW's favorite astronomy jokes).

Friday, March 2, 2012

Wisdom

(© Buffalo National River Between Steele Creek and Kyles Landing - Feb. 25, 2012)

My backpacking Mentor always said,"Remember that most backpacking accidents happen at river crossings". My backpacking crew used to always joke at river crossing, and say "Remember..." and we would all laugh. That changed a few years ago on a cold February morning when the crew was trying to return to our vehicle from a wilderness trip.  It had snowed while we were in the back country and the river also rose while we camped at a dry shelter. We rested well before the first river crossing, because we knew once we got wet, it was non-stop hiking for generating body heat. One of our own got swept at our third of five river crossings, and the temperature was below freezing. Damn near killed a good friend. Remember...